Home Blog Page 3

How to speed up CrashPlan restore

16

Problem / Outcome Summary

  • This article is an opinion article that will also show you a couple of tricks that should help you speed up your CrashPlan restore.

Why might I want to read this?

  • To speed up your CrashPlan restore
  • To learn a little more about how CrashPlan works

To be clear, why shouldn’t I just use the standard CrashPlan restore?

To be fair, you absolutely can use the standard CrashPlan restore. However, you may find that your restore speed does not perform as fast as you expected. In my case, the CrashPlan restore window on my Mac said it was running at between 15-20Mb/s. That speed is not bad in my country, however the CrashPlan application said at this rate it would be several weeks before my data was restored. On top of that, doing a few calculations, I found my actual restore speed was 4Mb/s. This was not going to be a product I subscribed to for long if I couldn’t speed this up.

Why I chose CrashPlan as my personal backup solution

After some fairly extensive research, it’s benefits over other (as at December 2015) cloud backup solutions are quite substantial.  In particular it’s price, it’s unlimited backup and it’s promise to ‘Never Delete anything’ gives you an outstanding retention time-frame that no other product currently beats.  It’s application is also fantastic, (well almost – more about that below) and a really big deal to me is that it offers true private encryption so your social security numbers or IRD numbers aren’t plastered all over the web begging for identity theft.  Seriously, for the price, no other product get’s close to the value of Code 42’s CrashPlan. After several months of use and a catastropic failure on my NAS filesystem (therefore a CrashPlan restore), I’ve now decided to sell my offsite NAS backup and replace it with this.

Why CrashPlan is the only product that could restore my data

As mentioned above, I recently had a catastrophic file system corruption which required me to restore my entire backup.  The thing about file system corruption is that on the outside, your files still look like they’re fine.  They still copy and you can still back them up.  Unfortunately this means any automated backup solution will actually back up the corrupted files intact so that when you restore them, you just get a duplicate corrupted copy.  Most other backup solutions do not allow you to ‘go back in time’ with your files and those that do have limitations to how far you can go.  CrashPlan however allows me to do this, which is exactly what I had to do.  Had it not been for CrashPlan’s ‘never delete anything’ policy, I would have lost all my files.

The CrashPlan restore speed problem

So I needed to restore my data.  CrashPlan’s Mac app was slow.   I had two issues:

  1. Restore speed running at an actual 4Mb/s
  2. The client had frequent disconnections, similar to that of unplugging a network cable.  The error I was getting was ‘Unable to restore because destination is unavailable’ and this error would come and go randomly, stopping the restore in the process.

Searching on google through the CrashPlan forums and generally there were rumblings that the Mac app was not great and worse that the Code42 support (customer champions) were not so great either.  After much scouring of the web, I phoned and when that failed, logged an online ticket.

I waited and unfortunately the response from Code42 seemed to align with the complaints on the internet.  Knowing how support centres work (I’ve run a few myself), there are SLA’s (or KPI’s) to meet.  Unfortunately some call centre managers let this become a priority over quality.  Here’s what happened:

  1. The response was fast and apologetic and I expect largely copy and pasted
  2. I was informed 1-3Mb/s was a typical restore speed and no suggestions were made to help resolve this
  3. I was informed an average data restore rate for CrashPlan is 10-30 gigs per day
  4. I was informed if I happened to have a fast internet connection it is unlikely to make a difference because it’s an affordable shared service
  5. It was implied (albeit very politely) that Code42 are only interested in helping me if my restore speed is less than 1Mb/s, to which I’d need to provide logs.

It was essentially then left to me to argue for my case.  It’s worth pointing out that most customers of this service wouldn’t have enough skill to argue successfully with the customer champions which is a pet hate I have with customer service these days.  That said, the service is very very cheap and the product is still very good.

So I realised there was no avenue for help from Code42 if I was getting more than 1Mb/s, disappointing.

How to speed up a CrashPlan restore and prove the customer champion was incorrect

  1. Change your CrashPlan client
    1. I switched my CrashPlan client from Mac to Linux.  My new speed was 70Mb/s.  The client didn’t disconnect all the time.
  2. Run simultaneous clients
    1. I was able to run both my Mac and my Linux restore clients simultaneously.  This sped up the CrashPlan restore to the total of both speeds

It is clear that as eluded to on various forums and web sites, the CrashPlan Mac client performs very poorly and the customer champions aren’t working toward customer service targets, rather a ‘quick response and close rate’.  It is also clear that the response surrounding the alleged ‘design’ of the Australian data centre to be around 4Mb is inaccurate. To give you an idea, on just the linux computer, I restored 53GB of data in about 60 minutes.  Compare that to the suggestion that I should only be able to restore 30GB in an entire day.

As always, we welcome your insights and opinions in the comments section below.

For a quick howto on how to set up CrashPlan on Ubuntu Linux, have a look at our HowTo article here.

Marshalleq

How to set up a proper firewall with IPFire for home or work

Problem / Outcome Summary

  • This article will show you how to set up a proper firewall with IPFire to protect your home or work network from security threats.
  • Please see the ‘Summary Overview’ tab below for a high level view of the objectives this ‘howto’ will achieve.

Why might I want to do this?

    • To stop people hacking into your network and files from the internet
    • To stop people hacking into your network and files from your Wifi access point
    • Because you have a typical home internet router which does not have a real firewall (most don’t)
    • Because you want an intrusion detection system (IDS) which isn’t available on home Internet routers
    • Because your router is too slow top cope with your internet speed (now becoming common with vDSL and Fibre connections)
    • To speed up your page response with a faster local DNS server (Routers can be slow)
    • To get proper firewall logging so you can ‘see’ what you are protecting yourself from and diagnose issues
    • To protect yourself from both the internal network as well as the external network (internet) (most routers don’t allow this)
    • Because you’ve read about the Edward Snowden leaks and are wondering what else you can do to be more secure

Foreword

To be clear, what does a firewall do?

Simply put, a firewall is a means of protecting your internal network (home, work, school etc) from the threats of the external (and sometimes internal network), the most common external network these day’s being the internet.  There are many many people in the world that try to break in to things, just to see if they can, many of them are not malicious, but many of them are.  If they’re malicious the most likely outcome is your having to spend money (maybe not even straight away) to fix something up – like your PC going slow, or a large internet bill due to a Trojan sending out a lot of traffic from your network somewhere.

You may be interested why I said above that firewall’s can also protect you from your internal network.  This usually fits into one of two scenarios, you have a large company or institution where internal people may bring viruses in, or even try to hack things themselves (think of a computer science department at a university, or a local college), or you have WiFi at home which always has the possibility of others gaining access remotely.  This is a truly scary scenario, you only have to look at the many news articles on the subject such as here to understand what I’m talking about, sadly this happens more often than people realise.

What does an intrusion detection system (IDS) do?

Simply put, an intrusion detection system is able to look at the traffic on your internal or external network interfaces, analyse it and draw security conclusions from the activity.  These conclusions are based around known attacks from a subscribed (free or non-free) dictionary.

Intrusion Detection Log

Take a look at a snapshot from my IDS log on the right (click to make bigger).  That’s a very small excerpt from a daily log of IDS activity, which in this example had only been running for less than a week.

Also note that an IDS is not the same as an IPS, an IPS is an intrusion ‘protection’ system, both of these I’ll go into in a later article.

Pre-Requisites

Software Dependencies

Hardware Dependencies

  • Compatible hardware such as a PC or compatible ARM device
  • Preferably two or more physical network ports

Tools Required

  • SSH Access
  • A recent Web Browser such as Firefox, Chrome or Safari

Other Dependencies

  • An external and internal network

High Level Summary Steps

The below lists the high level summary of steps we’re about to take during this howto.

      • Install the IPFire software on a PC
      • Configure the Network Settings
      • Configure the Firewall’s Internet Connection from a Web Browser

Implementation

Choose the installation method

You can install IPFire to run either directly off the hard disk of your computer, or run it directly off a USB stick.  Both examples are shown below, but I have used the full hard disk option.

Steps to create a firewall that runs from a USB stick

  1. Go to http://www.ipfire.org/download
  2. Click on ‘Other Download Options’
  3. Click the ‘Flash image’ word under, i586 – you will get a file similar to ipfire-2.17.1gb-ext4.i586-full-core93.img.gz
  4. Be sure to extract the gzip file so that it becomes ipfire-2.17.1gb-ext4.i586-full-core93.img – (On a Mac or Linux this is built in and you’ll only have to double click it, on windows you will need to download an appropriate decompression tool such as 7-zip.  Once extracted to the img file, you’ll need to create a bootable USB stick or SD card out of it.

For Mac please see our guide on How to create a bootable USB stick on MAC here.  If you’re on Windows try something like Rufus here.

  1. Plug in your USB stick or CDROM and turn on your computer.
  2. Ensure that your computer is configured to boot from your installation media in it’s BIOS
  3. Choose, US Keyboard, Pacific Timezone, ipfire hostname, localdomain for domain name or adjust as you feel appropriate
  4. You will be prompted for both a root password and an admin password.  The Root password is for console access (text and ssh) and the admin password is for the GUI accessed through a web browser.  It’s OK for them to be the same if you like.  Enter both these passwords and repeat in each case.
  5. Then skip the steps directly below and go to the ‘Configure the network settings’ section

Steps to create a firewall the runs from the PC hard drive

  1. Go to http://www.ipfire.org/download
  2. Click on the ‘Download IPFire 2.17 – Core Update 93’ or similar button – You will get a file that ends in iso, which you can either write to DVD, or create a bootable USB stick using the above instructions for Windows / Mac.
  3. Plug in your USB stick or CDROM and turn on your computer.
  4. Ensure that your computer is configured to boot from your installation media in it’s BIOS
  5. Choose, ‘Install IPFire 2.17 Core 92 or similar
  6. Enter
  7. Select Language (English)
  8. Click Start Installation
  9. Tab to accept licence and Press Space Bar to accept the licence
  10. Tab then Click enter on OK
  11. Choose to Delete all data on existing drive – Obviously you must know you want to do this)
  12. Choose ext4 filesystem
  13. You will see a partitioning system, then an install system message, plus a few other messages.
  14. You will then be presented with reboot option, click Enter on this.

Configure the network settings

You are going to be asked for a network configuration type using colours.  The colour options are defined as follows:

      1. Green & Red
      2. Green & Red & Orange
      3. Green & Red & Blue
      4. Green & Red & Orange & Blue

These colours are represented as follows:

      • Red / WAN – External network, typically connected to the internet via your ISP
      • Green / LAN – Internal / Private network, connected locally (such as in your home)
      • Orange / DMZ – The demilitarised zone, a server accessible directly from the Red / WAN interface but through the firewall
      • Blue / WLAN – Wireless network

So in this case, we will configure a Green & Red firewall.

Four network options are available

        • Nework and configuration type
        • Drivers and card assignments
        • Address settings
        • DNS and Gateway settings
  1. Choose Green + Red for a Standard two network card setup
  2. Click OK
  3. Go into Network and configuration type
  4. If you are asked if you want to change the settings, click OK
  5. Assign an interface to Green and Red and remember what this is, you will need to know the brands of which network cards you have, which is likely as you probably had to add one manually to get it into the system anyway.
  6. Click on the first interface (Green), which is your internal network and assign a network card to it.
  7. Click on the second interface (Red), which is your external (internet facing network card) and assign a network card to it.
  8. Click Done when complete
  9. Click on address settings
  10. Choose Green for your internal network and enter in a local IP address for the internal network. Traditionally this should be a very low number (i.e. 192.168.43.1 or 192.168.43.2, or a very high number (192.168.43.254). Generally firewalls are not assigned to be in the middle, this makes it easier to remember.
  11. In the Red Interface, Choose the appropriate option for your setup, in most cases this will be PPPoE for home based connections such as DSL or Fibre, if you have a business connection, it’s possible to be DHCP or Static, but unlikely unless you’re an enterprise or corporate customer, in which case you’re not likely to be using this particular firewall anyway.
  12. Click OK
  13. Click Done.
  14. Click DNS and Gateway Settings
  15. If you’re using PPPoE, these should be left blank and will be self assigned from your Internet Service Provider (ISP).
  16. Click OK when done.
  17. Click Done

Next, you can set up a DHCP server, this is a good idea if you’re essentially using this firewall as the main router for your network, (e.g. a home network) you can however choose to run your DHCP elsewhere by simply not checking the ‘enabled’ check box.

  1. Start Address: 192.168.43.100
  2. End address: 192.168.43.200
  3. Primary DNS (auto populated with the Firewall’s address)
  4. Secondary DNS (OK to leave blank)
  5. Default Lease (mins):4320 (Three days)
  6. Max Lease (Mins):4320
  7. Domain name suffice (localdomain) this will be passed to all the clients receiving an IP address for this server.
  8. Click OK
  9. Setup is complete

The system will now restart

Configure the Firewall’s Internet Connection from a Web Browser

Assuming the previous steps were done correctly, you should now be able to connect to your firewall via a computer connected to the same network.  Do note however, that your computer needs to have an appropriate IP address.  The easiest way is to ensure DHCP is switched on in your network settings and to reboot your computer AFTER you have given your new firewall time to start up.

  • Log into your new server using the IP address you created above for the Green interface.
    In a web browser type: https://ipfire.localdomain:444 or https://192.168.1.2:444 depending on what you set up.  The ‘:444’ denotes the port number IPFire allows you to connect through.
  • Please ensure you use https not http as using http will not work.  You will most likely be prompted that there is an invalid security certificate.  This is OK.
  • Enter in your username (admin) and the password you entered earlier (remember there were two passwords, this is the second one).
  • This is where you configure the system and can look at various system reports etc.

Configure your internet connection

  • On the page that comes up, (the one that says ‘Main Page’ at the top left), click on the word INTERNET that is underlined.
  • Go to interface, ensure PPPoE is selected (assuming that’s what you use).
  • In the Idle timeout, set this to 0 to ensure your connection is permanent (again assuming this is what you want).
  • In the reconnection section, ensure persistent is checked and dial on demand for DNS is checked.
  • Change the Maximum retries to a big number so that your system will recover from a big ISP outage (i.e. 1000).
  • Leave service name and concentrator name blank
  • Leave MTU / MRU blank
  • Enter in your Authentication information
  • Ensure DNS is on Automatic
  • Ensure you fill in the Profile Name (probably with the name of your ISP)
  • Click Save.

If done correctly, you should soon have some IP addresses show up on the Main Page under the INTERNET section. Eventually you would see a Status of ‘Connected – (11m 22s) – Profile Name

At this point, you already have a fully functioning firewall, courtesy of the IPFire team.  This is because the IPFire team include some sensible defaults out of the box.  It’s up to you what you want to do from here with the firewall.  In the coming articles, we’ll show you how to set up an intrusion detection system (IDS), intrusion prevention system (IPS) and some sane firewall rules.

Final Word

Compared to the firewalls of old, this installation is remarkably simple.  Of course, we’ve barely scratched the surface of what we can do to secure a network.

One problem I had was certain sites (ironically the ipfire forums is a fairly consistent problem) would not load, or even resolve the DNS name.  No amount of messing around would fix this until I realised it was DNSSEC.  I had to do was disable the DNSSEC feature in the firewall.  There is quite a mess with large packet streams and fallback to TCP port 53 that still isn’t working as it should.

To do this, you need to SSH into the box, go to the /etc/init.d/dnsmasq file and change the top line that says ENABLE_DNSSEC=1 to ENABLE_DNSSEC=0

Then simply enter # /etc/init.d/dnsmasq restart and you’re good to go.

Congratulations, you now have a better firewall than 99% of the globe.

As always, I welcome your insights and opinions in the comments section below.

**Hosting a web site? Why not apply and follow our article on how to speed it up with a CDN here!

Marshalleq

How to: Create bootable USB stick on Mac from ISO, dmg or img file

Problem / Outcome Summary

  • This article will enable you to convert an iso, dmg or img file to a bootable usb stick or SD Card on mac OSX using the command line.
  • Please see the ‘Summary Overview’ tab below for a high level view of the objectives this ‘howto’ will achieve.

Why might I want to do this?

  • To create bootable installation media on a USB stick such as:
    • A rescue USB stick for OSX
    • Installation media for Windows 10, 7 or any other version
    • Installation media for a Linux operating system such as Ubuntu, Sabayon, Redhat, SuSe or any other flavour
    • Micro SD installation media for a Raspberry Pi
  • You may also want to convert apple’s native dmg format to iso or vice-versa

Foreword

To be clear, what exactly is an img, dmg or iso file?

Simply put, these are called ‘container’ files, which typically emulate traditional CD or DVD optical media, which have files contained within.  A container file is useful because it is not constrained to the size limitations of current generally available optical media and most crucially remains the simplest way to create a ‘boot disk’ to perform installation and recovery options for the target system.

For example, when a new version of Mac OSX or Windows comes out (i.e. Windows 10), you’ll typically have two choices:

  1. A dmg file to download in the case of mac or
  2. An iso file to download in the case of windows.  (Windows is now offering a USB stick download, but if you have a mac, it’s actually easier to use this process anyway).

What’s the difference between are each of these file formats?

  • img file – Essentially img and dmg are the same thing, it’s a throw back from earlier mac days, but basically both img and dmg are used on mac.
  • iso file – An iso file is a long standing format designed to be  a complete copy of an optical disk.  It’s name comes from ISO9660 referring to a CDROM standard.  The main thing to know is it’s what you generally use on Windows, though mac can read this as well.

Pre-Requisites

Software Dependencies

  • Mac OS
  • An img, dmg or iso file to convert

Hardware Dependencies

  • A USB stick or SD card (doesn’t matter which)
  • A USB port in your mac

Tools Required

  • All required tools come standard with Mac OS

Other Dependencies

  • None

High Level Summary Steps

The below lists the high level summary of steps we’re about to take during this howto.

  • Convert your file to img
  • Copy your img file to your USB stick or SD Card

Implementation

Convert your file to img

Open up the Mac OS terminal app, located in Applications, Utilities

Change directory to where your iso file is and type the following:

  • hdiutil convert -format UDRW -o targetfile.img inputfile.iso

Note – in most cases OSX will create your .img file with the extension .dmg, just rename it like this:

mv yourfile.dmg yourfile.img

Copy your img file to your USB stick or SD card

You’re going to use the same console to see what current devices are in the list, then you’ll insert your USB stick or SD card and check what has changed.

  • diskutil list
  • Insert your USB stick or SD Card and wait for 5 seconds for things to settle
  • diskutil list (again)

You should see your USB stick or SD card device in the list (look also at naming, but generally there should be a new device somewhere in the list)

  • Take note of the name of this device (it will be something like /dev/disk3
  • diskutil unmountDisk /dev/diskx (where x is the disk number you memorised earlier)

Next we will write our newly created image file to this new USB Stick or SD card.  Note however that because we’ve unmounted the disk we need to convert the terminology, in my case /dev/disk3 becomes /dev/rdisk3.  Also note, you must have root access to do this.

  • sudo dd if=inputfile.img of=/dev/rdiskx bs=1m
  • Enter your password for sudo if prompted
  • sync
  • diskutil eject /dev/diskx (just to be really safe)

Depending on the size of your image file and the speed of your USB port, this may take 5 or even 10 minutes to complete.  Once done you have installation media that you can plug into the USB port or SD slot of another computer and perform your new Windows 10, Mac or linux installation.

Final Word

I got frustrated with having to download third party applications to do this for me.  This solution has a number of advantages over other solutions, in particular, once you know the commands, it’s fast and easy, there’s nothing to download and it’s a completely free solution.  Enjoy.

Marshalleq

How to set up Crashplan Headless on Ubuntu Linux

Problem / Outcome Summary

  • This article will show you how to install Crashplan Headless on Ubuntu Linux
    • (To Learn how to Install Crashplan on Ubuntu Linux Desktop (with a GUI) please click here)
  • Please see the ‘Summary Overview’ tab below for a high level view of the objectives this ‘howto’ will achieve.

Important Update

17 Jan 2016 – There are currently issues with the new CrashPlan client / server mix for version 4.5.2 in this configuration.  In particular, the guide works, but some hours down the track it breaks.  I am addressing this and will update this guide when complete.

23 Jan 2016 – Fixed.  Please see comments section at bottom of article for details.

Why might I want to do this?

  • To backup any data, centralised from your network or specific to your computer to the Crashplan Cloud (this saves money as you don’t need a family plan)
  • To create a backup ‘target’ for other computers on your network to backup to
  • Because a Crashplan headless (no GUI) style of computer performs better and is more stable

Foreword

To be clear, what does Crashplan Headless do?

Simply put, Crashplan gives you good automatic options for backing up your data.  These can be at a cost, or at no cost depending on which situation suits you best.

What are the current backup features of Crashplan Headless?

Crashplan works on Windows, Mac OS X and Linux.  It also has unofficial Crashplan headless ports for a number of NAS devices including QNAP, Synology and Netgear’s ReadyNAS.

Other notable features of Crashplan include a truly unlimited backup for a very low cost and that it retains any and all deleted versions of your files forever.

Something particularly important in this day and age, is Crashplan’s ability to support client side encryption.  Client side encryption means that Crashplan has an extra level of security than most online backup systems do today.

With client side encryption, Code42 (the Crashplan company) do not hold your decryption key themselves, you do.  Client side encryption makes it nearly impossible for your data to end up being used for purposes other than it was intended because only you know the encryption key.  I say ‘nearly impossible’, because there’s always a chance with technology that someone such as with the now famous NSA / FBI and Apple encryption battle.   However with this feature the data is most definitely safer from e.g. identity theft than it will be on your own hard drive at home. Be warned however,  if you use client side encryption and then lose your key, your backup is useless and you would be unable to retrieve your Crashplan data).

For me, client side encryption is a mandatory requirement – I do not put personal data on the internet such as e.g. Inland Revenue Department or Social Security numbers, banking numbers etc.  Whether you realise it or not, these will likely be on your hard drive somewhere, which means you’re probably backing them up to the internet.

A full comparison list of features for Crashplan can be found here.

Plans

There are three tier’s of Plans available with Crashplan.  Crashplan Home, Crashplan Business and Crashplan Enterprise.

Crashplan Home Options:
  • Free: Backup to local assets such as hard drives and computers owned by you
  • Free: Backup to remote assets such as friends computers, or computers you own that are connected to the internet
  • Not Free: Individual / Family Plans listed here
Crashplan Business / Crashplan Enterprise

Some free options do exist in the Business / Enterprise plans too, specifically a peer to peer option in the enterprise product.

Remember, for a full comparison of all the options, see the Crashplan comparison here.

Please note: Storing your personal information on the internet is highly risky.  Globally, the new generation of internet users have become complacent with persona data such as that submitted to social sharing  sites so far with with little consequence.  However the impacts of this are still being worked out through legal and moral systems.  If you store any data that could be considered sensitive to you, or misinterpreted by others, it is strongly recommended to use a client side encryption key.

Do you REALLY want to pay someone else to backup your data?

As you have seen above, there ARE free options available, within the Crashplan application.  These will work if you set up any kind of Crashplan software including Crashplan headless on Ubuntu.  It is very rare to get such a full featured and reliable application as Crashplan is, especially one that is so simple to use and includes very usable free options.

Tip for OS X customers: Mac OS X customers in particular should note, that Crashplan removes the limitations of the Mac built in backup.  The shipping version of OS X is limited to Apples Time Machine backup only.  Strictly speaking, Time machine is designed only to do a full system backup, or a full user backup.  Crashplan offers a much higher quality of backup (and a free alternative) that allows you to select a smaller subset of backup files (such as your documents folder) and enables you to back it up elsewhere on your network according to the free options above.

The three most likely scenarios requiring recovery of your data are:

  1. Accidental deletion of a file or folder
  2. Loss of data due to theft or fire
  3. Hard Drive Crash

All of these scenarios are covered by CrashPlan free, provided that that scenario 2 is hosted in a remote location that would not be affected by the same fire or theft.  My suggestion is to make a mutually beneficial deal with a friend to use each others spare hard drive space (or buy each other a hard drive to use), then share that in Crashplan so that you have off site backups.  This would actually get you 99% safety.  The other 1% is in the unusual but possible case that your friends computer hard drive dies and e.g. your computer is stolen at the same time.  Not common, but not unheard of.  To mitigate this scenario, you could of course add a third friend to backup to.

So if I can backup for free, why would I pay to backup to the Crashplan cloud?

There are a few reasons for this:

CrashPlan only costs you $5 per month for what is essentially a guaranteed recovery.  However there are some other items that are also worth noting.

  1. Restoration speed – Internet connections in countries like New Zealand and Australia, do not commonly have fast upload speeds.  If you want to restore your data from a friends computer en-masse, it will likely be slower than using Crashplan due to their limited upload (typically about 1Mb/s in these countries).  Make sure you check your friends upload speed.  Of course this won’t matter for just a few files, only for many files.
  2. Enterprise data security – Crashplan utilise data centers that maintain your data in monitored conditions to protect against various threats such as overheating, security hacks and viruses such as Cryptolocker.  If your data is stolen from your friends house, you would want to be double sure you have client side encryption before they start trolling through your personal photo’s and bank account numbers.
  3. Availability – This is potentially the worst one.  Most people switch their computers off at night and this may happen at the time you turn yours on.  This can result in backups not being completed (ever), especially considering how long it can take with the poor upload speed some customers have and the quantity/size of backup data many of us now have on our computers.  Make sure you check the progress indicator to see how your backup is tracking over several days.
  4. Unlimited backups – Your friends hard drive space is eventually going to run out, (and so is yours if they are backing up to your computer too).  Crashplan really does offer a truly unlimited backup.

What is the performance like?

The performance will entirely depend on your scenario and also on your client as I found out here.  Certain types of files can be compressed which means that they will upload faster.  If you’re uploading to a friends house, they may have a slow connection, or you may have a slow upload capability.  ADSL customers in NZ and Australia will only have about a 1Mb/s upload speed which would take months to upload a fairly typical 1TB of disk space.  VDSL or fibre customers on the other hand may take days or even weeks for the same data.  One option in Crashplan that does make a difference is the de-duplication option in the advanced settings.  Set this to minimum for more speed if you don’t have a powerful processor (especially if you run client side encryption), although the environmentalist in me says you should leave this alone for reasons I won’t explain here (it uses less hard disk by doing some clever stuff).  That said, make sure you test it out yourself in both scenarios as de-duplication means you don’t have to upload similar data in different files and this could also be of benefit with a slow connection if you have a lot of duplication.

Pre-Requisites

Software Dependencies

  • Ubuntu Linux

Hardware Dependencies

  • An internet modem / router capable of performing NAT

Tools Required

  • SSH Access
  • A recent web browser

Other Dependencies

  • A working internet connection

High Level Summary Steps

The below lists the high level summary of steps we’re about to take during this howto.

  • Download and extract the Crashplan Application
  • Install and configure the Crashplan Application
  • Connect to your Crashplan Headless on Ubuntu Service

Implementation

Download and extract the Crashplan Application

  1. wget https://download2.code42.com/installs/linux/install/CrashPlan/CrashPlan_4.5.2_Linux.tgz
  2. sudo apt-get update
  3. tar zxvf
  4. tar zxvf CrashPlan_4.3.0_Linux.tgz

Install and configure the Crashplan application

  1. become root
  2. su
  3. password
  4. cd Crashplan-install/
  5. ./install.sh

(If you want to uninstall a previous installation, just type ./uninstall -i /usr/local/crashplan)

Welcome to the Crashplan Installer.
Press enter to continue with installation.

  1. Press Enter

Validating environment…
detected root permissions
You must review and agree to the EULA before installation.
Press enter to read the EULA. (Space scrolls quicker)

  1. Press Enter

Do you accept and agree to be bound by the EULA? (yes/no)

  1. Type ‘Yes’ and press <Enter>

Directory Locations

Press <Enter> on all the defaults below, taking particular note of number 4 as this is where ‘friends’ data is stored (or data from your other computers doing local backups.  You may like to make it somewhere that has plenty of free space.

  1. What parent directory do you wish to install CrashPlan into? [/usr/local]
  2. /usr/local/crashplan does not exist. Create /usr/local/crashplan? (y/n) [y]
  3. What directory do you wish to link the CrashPlan executable to? [/usr/local/bin]
  4. What directory do you wish to store backups in? [/usr/local/var/crashplan] /mnt/backups
  5. /mnt/backups does not exist. Create /mnt/backups? (y/n) [y] y
  6. What directory contains your SYSV init scripts? [/etc/init.d]
  7. What directory contains your runlevel init links? [/etc/rc2.d]

The installer then confirms your selections in a list, press y if correct, n if not so that you can do them again.

Your selections:
Crashplan will install to: /usr/local/crashplan
And put links to binaries in: /usr/local/bin
And store datas in: /mnt/backups
Your init.d dir is: /etc/init.d
Your current runlevel directory is: /etc/rc2.d
Is this correct? (y/n) [y] y

The Java Runtime Environment is then downloaded from the internet and uses the locations you have just specified.  Wait for this to complete.
downloading the JRE using wget
–2015-08-02 16:24:48– http://download.code42.com/installs/proserver/jre/jre-7u45-linux-x64.tgz
Resolving download.code42.com (download.code42.com)… 216.17.8.19
Connecting to download.code42.com (download.code42.com)|216.17.8.19|:80… connected.
HTTP request sent, awaiting response… 301 Moved Permanently
Location: https://download2.code42.com/installs/proserver/jre/jre-7u45-linux-x64.tgz [following]
–2015-08-02 16:24:48– https://download2.code42.com/installs/proserver/jre/jre-7u45-linux-x64.tgz
Resolving download2.code42.com (download2.code42.com)… 216.17.8.57
Connecting to download2.code42.com (download2.code42.com)|216.17.8.57|:443… connected.
HTTP request sent, awaiting response… 200 OK
Length: 46843538 (45M) [application/octet-stream]
Saving to: ‘jre-7u45-linux-x64.tgz’
100%[======================================>] 46,843,538 4.16MB/s in 12s
2015-08-02 16:25:01 (3.66 MB/s) – ‘jre-7u45-linux-x64.tgz’ saved [46843538/46843538]
Java Installed.
Unpacking /home/username/CrashPlan-install/./CrashPlan_4.3.0.cpi …
60490 blocks

Also note the number of files that linux will watch.  You will likely have more files than this so you will need to adjust it.
Your Linux system is currently configured to watch 8192 files in real time.
We recommend using a larger value; see the CrashPlan support site for details
Starting CrashPlan Engine … Using standard startup
OK
CrashPlan has been installed and the Service has been started automatically.

If you want to check that CrashPlan is running on your Ubuntu Headless computer, simply enter:

  1. cd /usr/local/crashplan/bin (lately changed to /usr/local/bin
  2. ./CrashPlanEngine –status

You should see a message saying the CrashPlan engine is running

Note as above if you have a lot of files, you’ll need to update the Java heap size – see CrashPlan’s article on this here.

Also, to update the number of files your linux machine can watch enter the below:

echo 1000000 > /proc/sys/fs/file-max (assuming you have 1,000,000 files to watch in your backup (I do).

Connect to your Crashplan Headless on Ubuntu service

When you install a Crashplan headless system, you’ll want to connect the Crashplan GUI to it, from another computer.  This will allow you to configure your Crashplan backup folders (and other things) easily.  When you’re finished, the changes are saved to the headless computer.

Make sure you have installed the Crashplan application to your local client computer from the Crashplan downloads page.  A guide for doing this in an Ubuntu GUI can be found here.

There is varying information about what you must and must not do to set this up.  Some information suggests you do not need to copy the ‘ui.info’ file, some says you do, some says you need an SSH port redirect, some doesn’t mention it at all.  The truth is I’ve had mixed results.  Often nothing works permanently.  Until recently, I did not need to create an SSH tunnel, then I did and now that’s stopped working again.  This is the way it’s likely to stay while Crashplan oddly insists it’s unsupported but details how to do it at the same time.  Occasionally the ui_info file gets auto detected making people believe it is not needed, but in most cases you will need to do it.  As far as SSH port redirects, try it without, and if you can’t get it to work, try it with the tunneling.

Backup and copy the .ui_info file from the Ubuntu headless computer to the appropriate directory on the local computer (if you’re using mac, you can use the following commands – note be careful with the spaces, if in doubt you can put ” around it).  For windows, use PuTTY, for Linux just use same as Mac method.

Mac Method

On your Mac, backup your .ui_info file
  1. mv /Library/Application Support/CrashPlan/.ui_info /Library/Application Support/CrashPlan/.ui_info_original
Copy the Headless .ui_info file to your mac
  1. scp username@yourheadlessIP:/var/lib/crashplan/.ui_info /Users/yourmacusername
  2. sudo cp /Users/yourmacusername/.ui_info /Library/Application Support/CrashPlan/

(Current .ui_info file locations can be found on the Code42 support page here).

Point your mac Crashplan application to the headless server
  1. vi /Applications/CrashPlan.app/Contents/Resources/Java/conf/ui.properties
  2. Change the #serviceHost line to the ip address of your headless server, remove the ‘#’ and save the file

If you need ssh tunneling

On a Mac
  1. sudo vi /Library/Application Support/CrashPlan/.ui_info
  2. change the line that reads #servicePort from 4243 to 4200 and remove the # to uncomment the line
  3. ssh -L 4200:localhost:4243 user@yourheadlessipaddress

Start the local Crashplan app and this should now be working.

Final Word

  • To date, I have found no reason to change other settings such as port settings in the ui.properties file.  I’m sure some people will have their reasons.
  • You can always change the IP address back should you wish to manage the CrashPlan service on your local computer.

So there you have it, a fully functioning Crashplan backup that allows centrally hosted files to be backed up to Crashplan.  This saves money because you don’t need to employ a more expensive licence provided you all save files to a single location on your home Ubuntu Server or NAS.

**Looking for creating a manual backup process?  Why not read our article on how to create a manual backup process and why you need one, here.

Marshalleq

How to: Plex on Apple TV 3 using Ubuntu Headless and PlexConnect

[vc_tta_tabs active_section=”1″ pagination_style=”outline-square”][vc_tta_section title=”Summary” tab_id=”1483657727692-588765df-8139e50c-cffea4b0-d7dc”][vc_custom_heading text=”Problem / Outcome Summary”]
  • This article will enable you to watch media served from any Plex server in your house on from Plex on your Apple TV 3
  • If you don’t have a Plex Media Server, have a look at our Plex Media Server on Ubuntu Linux Headless guide here.
  • Please see the ‘Summary Overview’ tab below for a high level view of the objectives this ‘how to’ will achieve.

Why might I want to do this?

  • Because you already have an Apple TV and it doesn’t work with Plex out of the box
  • Because Apple TV is a premium product, with full working remote and low power consumption
  • Because it saves you having to get another device, when you already have a capable Apple TV.
  • Because you don’t own a Mac, and PlexConnect works great running entirely on Ubuntu Linux Headless or any other Linux computer.
[/vc_tta_section][vc_tta_section title=”Foreword” tab_id=”1483656936153-fec58c10-e606e50c-cffea4b0-d7dc”][vc_custom_heading text=”Foreword”]

To be clear, what does PlexConnect do?

Simply put, PlexConnect provides a ‘web system’, that runs on your Apple TV and ‘streams’ the media from your Plex device in a nice easy to use package.  This is not available by default with the Standard Apple TV 3, which is why plexconnect was created.

[/vc_tta_section][vc_tta_section title=”Pre-Requisites” tab_id=”1483656936239-1facad3b-9216e50c-cffea4b0-d7dc”][vc_custom_heading text=”Pre-Requisites”]

Software Dependencies

Hardware Dependencies

  • An Apple TV 2 or 3
  • An internet Modem / Router capable of performing NAT

Tools Required

  • SSH Access
  • A recent web browser

Other Dependencies

  • A working internet connection
[/vc_tta_section][vc_tta_section title=”Summary Steps” tab_id=”1483657008528-9fc62da7-5742e50c-cffea4b0-d7dc”][vc_custom_heading text=”High Level Summary Steps”]

The below lists the high level summary of steps we’re about to take during this howto.

  • Connect to Ubuntu Linux and download required software
  • Configure PlexConnect
  • Test your software
  • Start PlexConnect automatically at boot
  • Configure your Apple TV
[/vc_tta_section][vc_tta_section title=”Implementation” tab_id=”1483657023013-0e8f9bfb-cd0fe50c-cffea4b0-d7dc”][vc_custom_heading text=”Implementation”]

Connect to Ubuntu Linux and Download Required Software

  1. Log in to your Ubuntu box with SSH
  2. Ensure you are in your home directory e.g. /home/yourname
  3. sudo apt-get update (to update packages to latest versions
  4. sudo apt-get install unzip
  5. sudo apt-get install python-imaging (for fanart backgrounds that look nice)
  6. wget https://github.com/iBaa/PlexConnect/archive/master.zip (latest version of PlexConnect)

Configure PlexConnect

  1. While still in the root of your home directory,
  2. unzip master.zip
  3. sudo mv PlexConnect-master /usr/local/lib

Generate the required certificates.

Please note: Yes it’s perfectly good to do this entirely on Ubuntu rather than on a Mac as some people have tried to suggest, which is great if you don’t own a mac.

**Update 11Dec2016:  There is one comment below from Aylin about receiving an error when making a certificate request.  It was solved by changing the path of the key files.  Be mindful of which directory you are in and where your files are.  Happy to answer questions if you get stuck.**

  1. Again, while still in your home directory, perform the below
  2. openssl req -new -nodes -newkey rsa:2048 -out trailers.pem -keyout trailers.key -x509 -days 7300 -subj “/C=US/CN=trailers.apple.com”
  3. openssl x509 -in trailers.pem -outform der -out trailers.cer && cat trailers.key >> trailers.pem
  4. cp *.cer *.key *.pem /usr/local/lib/PlexConnect-master/assets/certificates/
  5. cd /usr/local/lib/PlexConnect-master
  6. sudo vi Settings.py Change, “ip_dnsmaster = 8.8.8.8″ and replace 8.8.8.8 with your internal routers IP address or similar if you have geo-unblocking or similar”

* Note the ‘prevent_atv_update = True’ line, which you can change should you wish to update your firmware on your ATV

Test your software

cd /usr/local/lib/PlexConnect-master

sudo ./PlexConnect.py

You’ll get similar to the following:
12:11:11 PlexConnect: ***
12:11:11 PlexConnect: PlexConnect
12:11:11 PlexConnect: Press CTRL-C to shut down.
12:11:11 PlexConnect: ***
12:11:11 Settings: add setting enable_plexgdm=True
12:11:11 Settings: add setting ip_pms=192.168.178.10
12:11:11 Settings: add setting port_pms=32400
12:11:11 Settings: add setting enable_dnsserver=True
12:11:11 Settings: add setting port_dnsserver=53
12:11:11 Settings: add setting ip_dnsmaster=192.168.1.1
12:11:11 Settings: add setting prevent_atv_update=True
12:11:11 Settings: add setting enable_plexconnect_autodetect=True
12:11:11 Settings: add setting ip_plexconnect=0.0.0.0
12:11:11 Settings: add setting hosttointercept=trailers.apple.com
12:11:11 Settings: add setting port_webserver=80
12:11:11 Settings: add setting enable_webserver_ssl=True
12:11:11 Settings: add setting port_ssl=443
12:11:11 Settings: add setting certfile=./assets/certificates/trailers.pem
12:11:11 Settings: add setting allow_gzip_atv=False
12:11:11 Settings: add setting allow_gzip_pmslocal=False
12:11:11 Settings: add setting allow_gzip_pmsremote=True
12:11:11 Settings: add setting loglevel=Normal
12:11:11 Settings: add setting logpath=.
12:11:11 PlexConnect: started: 12:11:11
12:11:11 PlexConnect: Version: 0.5-dev-020615
12:11:11 PlexConnect: Python: 2.7.6 (default, Jun 22 2015, 17:58:13)
[GCC 4.8.2]
12:11:11 PlexConnect: Host OS: linux2
12:11:11 PlexConnect: PILBackgrounds: Is PIL installed? True
12:11:11 PlexConnect: IP_self: 192.168.1.20
12:11:11 DNSServer: started: 12:11:11
12:11:11 DNSServer: ***
12:11:11 DNSServer: DNSServer: Serving DNS on 192.168.43.20 port 53.
12:11:11 DNSServer: intercept: [‘trailers.apple.com’] => 192.168.43.20
12:11:11 DNSServer: restrain: [‘mesu.apple.com’, ‘appldnld.apple.com’, ‘appldnld.apple.com.edgesuite.net’] => 127.0.0.1
12:11:11 DNSServer: forward other to higher level DNS: 192.168.1.1
12:11:11 DNSServer: ***
12:11:11 WebServer: started: 12:11:11
12:11:11 WebServer: ***
12:11:11 WebServer: WebServer: Serving HTTP on 192.168.43.20 port 80.
12:11:11 WebServer: ***
12:11:11 WebServer: started: 12:11:11
12:11:11 WebServer: ***
12:11:11 WebServer: WebServer: Serving HTTPS on 192.168.43.20 port 443.
12:11:11 WebServer: ***

Press CTRL-C to shutdown afterwards if you wish to make it start automatically at boot.

[spacer color=”429d4a” icon=”fa-angle-double-down” style=”3″]

Start PlexConnect automatically at boot

  1. sudo ln -s /usr/local/lib/PlexConnect-master/PlexConnect_daemon.bash /etc/init.d/PlexConnect_daemon.bash
  2. sudo update-rc.d PlexConnect_daemon.bash defaults

PlexConnect should start automatically upon a reboot of your Ubuntu Linux system.

Configure your Apple TV

  1. Go to the settings menu on the Apple TV
  2. Select the General option
  3. Then scroll down and ‘highlight’ the ‘send data to apple’ and change to ‘No’
  4. While this remains highlighted, press the ‘Play’ button on the Apple Remote
  5. Enter http://your_plexconnect_ip_address/trailers.cer (so make it like 192.168.1.20/trailers.cer)

You also have to change the DNS on the Apple TV to point to your PlexConnect IP address.  You do this through Settings, General Network, WiFi, or Settings General, Network, Ethernet.

Go through the network settings as if you were setting them up from scratch and when it get’s to the configuration page, change the Configure DNS setting to Manual and enter in your IP address there.  At this point you should be all done and all should be working.  You may have to restart your Apple TV.

You access Plex by clicking on the trailers icon on the apple TV.

That’s it!

[/vc_tta_section][vc_tta_section title=”Final Word” tab_id=”1483657035357-36e2d8d1-b325e50c-cffea4b0-d7dc”][vc_custom_heading text=”Final Word”]

Note that running Plex on Apple TV actually forces the Plex Server to do CPU intensive Transcoding.  This is because the Apple TV has been designed by Apple to only play approved media formats which usually don’t cover those included in your Plex Server.  Plex therefore has to convert media from whatever format you have it in, into the Apple TV supported format.

As a guide, you need about 2000 on CPU Mark per 1080p transcode.  Check your CPU and how it stacks up here.

See our latest guide on how to set up Plex Media Server file permissions here.

Marshalleq

[/vc_tta_section][/vc_tta_tabs]

How to install Plex Media Server on Ubuntu Server Headless

[vc_tta_tabs active_section=”1″ pagination_style=”outline-square”][vc_tta_section title=”Summary” tab_id=”1483657727692-588765df-8139e50c-cffe9549-9db4″][vc_custom_heading text=”Problem / Outcome Summary”]
  • This howto will enable you to install the Plex Media Server on Ubuntu Server
  • For how to install Plex Media Server on another operating system, please click your Platform: Windows
  • Please see the ‘Summary Overview’ tab below for a high level view of the objectives this ‘howto’ will achieve.

Why might I want to do this?

  • To run Plex on a machine that is ‘headless’ and doesn’t have the overhead of running a full Graphical User Environment (GUI)
  • To run Plex as a service, in the background, automatically starting at boot time
  • To move Plex from your NAS which may not have enough CPU to cope with demand
  • Because Plex is on a machine that’s get’s disconnected from the network and you want to change to a permanently connected system
  • Because you know that running it on Ubuntu Linux headless is more powerful running it on Windows, MacOSX, Ubuntu (GUI) or a NAS

See also

[/vc_tta_section][vc_tta_section title=”Foreword” tab_id=”1483656936153-fec58c10-e606e50c-cffe9549-9db4″][vc_custom_heading text=”Foreword”]

To be clear, what is Plex and why does running it on Ubuntu Server Headless make any difference?

Plex is a fantastic media centre based on the software now known as Kodi, and formerly known as XBMC.  The main difference between the two, is that Plex runs a true client / server setup, which means your IT knowledge doesn’t have to be at expert level to get a multi user, multi client setup running.  Plex runs both a free and a subscription model, with the most significant differences being the subscription model get’s bug fixes and updates quicker and more recently a few enhanced features.  The most noteable of those features in my opinion is the inclusion of a Spotify like music organisation and listening experience.

At some point in your Plex journey, you may find yourself listening to your music at work, or watching home video’s on multiple computers.  When this happens, you’re likely to need an always on system, a more powerful system or perhaps getting a bit more power out of your existing system by re-purposing it with Linux.

The latter case is the intent of this article, which has been chosen to run on Ubuntu Linux (Server Edition), because Ubuntu is supported by Plex officially and Ubuntu is the only true headless option out of the supported options (excluding the usually much lower powered NAS options).

On the face of it, an Ubuntu Server (or any other text based Server) is cold boring and mysterious, the domain of a true geek, however that is exactly the power of a text based system – when you realise it is running in the corner with the sole task of serving you and your Plex setup (because there is no complicated GUI, no services running you don’t need, and valuable CPU cycles are not being used up by antivirus or any other non-essential tool) it is quite an eye opening experience.  Because Plex can be quite CPU intensive, this method works well.

What things use up the CPU?

Basically it comes down to this:

  1. Plex runs in two modes for video, one mode is a direct non CPU intensive playback mode (i.e. no transcoding) which comprises of:
    1. Playback devices that have Plex installed and appropriate codecs attached
    2. Devices that are non-plex but have appropriate codecs attached
  2. The other mode is a ‘Transcode’ mode which comprises of:
    1. Devices that do not understand all video formats such as Apple TV
    2. Devices that are constrained by bandwidth (such as when you connect to your home setup over the internet)

Simply put, the transcoding feature of Plex uses the CPU to re-encode your video or music into a format supported by the device you’re playing it on, or to an appropriate quality level to match the available bandwidth you have.

[/vc_tta_section][vc_tta_section title=”Pre-Requisites” tab_id=”1483656936239-1facad3b-9216e50c-cffe9549-9db4″][vc_custom_heading text=”Pre-Requisites”]

Software Dependencies

  • Ubuntu Linux
  • Plex Media Server

Hardware Dependencies

  • The hardware your Ubuntu Linux runs on
  • An internet Modem / Router / Switch to connect your Plex Media Server and client through

Tools Required

  • SSH Access
  • A recent Web Browser

Other Dependencies

  • A working internet connection
[/vc_tta_section][vc_tta_section title=”Summary Steps” tab_id=”1483657008528-9fc62da7-5742e50c-cffe9549-9db4″][vc_custom_heading text=”High Level Summary Steps”]

The below lists the high level summary of steps we’re about to take during this howto.

  • Install Ubuntu Linux on your desired hardware (currently out of scope of this article)
  • Install the latest Plex Media Server onto Ubuntu Linux
  • Configure Plex Media Server
[/vc_tta_section][vc_tta_section title=”Implementation” tab_id=”1483657023013-0e8f9bfb-cd0fe50c-cffe9549-9db4″][vc_custom_heading text=”Implementation”]

Steps to Install Plex Media Server on Ubuntu Linux

Download the latest Plex Media Server from plex.tv

This guide uses the official Plex Media Server package, rather than an unofficial third party repository, this way you can be sure of the quality and authenticity of the software.

When you first start using a headless (text only) type of system, it suddenly becomes apparent that you’re going to have to learn some new things.  Specifically, how to use the command line and how to get by without a web browser.  However, this is actually easier than it sounds and although all the specifics will not be covered here, it’s fairly easy to follow the steps below with little experience.

The first challenge for this installation is figuring out how you get the Plex Media Server onto the headless (no GUI) Ubuntu Server without a web browser.  While there are a few ways of doing this, including using a USB stick, using a text mode browser such as Lynx and mounting a network drive, by far the easiest currently is copying the link from another computers browser and into a terminal session via SSH.  If you’re in Windows, you’re going to need PuTTy, however Mac has ssh included.

The first step is: In a normal PC web browser, go to https://plex.tv/downloads and click on the orange ‘download button in the sign up and download section.  Ensure that the Operating system (which auto detects the one your web browser is on) is set to Linux.  Next click the download button under that and choose Ubuntu64bit or 32bit as appropriate.  On the new web site it is no longer possible to just right click the icon and copy the link.  Now, you must start an actual download to your main computer before this link can be copied.  Once the download has begun, in firefox or Safari you can ‘right click the download in the browser and choose ‘copy link’.  For Chrome, you need to click the ‘show all’ icon at the bottom right, then in the screen that comes up, right click that and choose copy link address.

Also, don’t forget to do this under the Plex Pass menu (if you have one) rather than the Public Downloads menu.

The second step is to copy into your headless machine via an SSH session.

SSH to your new ubuntu server

$ ssh username@192.168.1.x

In the window that comes up, type ‘wget’ and then press CTRL-V or right click and paste the link you just copied.  Then press enter.  This should downlaod the Plex package from plex.tv onto your new Linux box.

The syntax will look similar to: wget https://downloads.plex.tv/plex-media-server/0.9.12.6.1347-54c2e56/plexmediaserver_0.9.12.6.1347-54c2xx_amd64.deb

Install Plex

sudo dpkg -i plexmediaserver_0.9.12.6.1347-54c2xx_amd64.deb

You will then be prompted for your password
[sudo] password for username_here:

Then the package will be installed and you should see similar to the below:
Selecting previously unselected package plexmediaserver.
(Reading database … 55709 files and directories currently installed.)
Preparing to unpack plexmediaserver_0.9.12.6.1347-54c2e56_amd64.deb …
Unpacking plexmediaserver (0.9.12.6.1347-54c2e56) …
Setting up plexmediaserver (0.9.12.6.1347-54c2e56) …
OK
plexmediaserver start/running, process 1208
Processing triggers for ureadahead (0.100.0-16) …
ureadahead will be reprofiled on next reboot
Processing triggers for mime-support (3.54ubuntu1.1) …

If dpkg reports an error about dependency problems, run sudo apt-get install -f to download the missing dependencies and configure everything, but this is likely not necessary for most installations.

Configure Plex – Ensure your media is available.

You need to ensure you have the music, home video’s etc in a location Ubuntu Linux can see them, this could be on a disk attached directly to Linux or on a network device.  In my case, I use a NAS.

In linux, it’s generally better to use NFS because NFS uses a lot less CPU to run and is quite simple to set up, however SMB / CIFS currently works better on QNAP NAS (which I have) due to a bug.

On your Ubuntu linux Plex box ensure you have your NAS mount points mounted in the mnt directory, so you can connect through them from Plex.

Firstly make the directories (or ‘folders’) where the mount will connect to:

mkdir /mnt/Video

mkdir / mnt/Audio etc

Make sure you install the required network connection software for your scenario:

For NFS:

sudo apt-get install rpcbind nfs-common (enter your password and watch the installation run)
For samba
For SMB/CIFS (What Windows uses)
sudo apt-get install cifs-utils
Make a persistent mount to your network shares on Linux by editing the /etc/fstab file
vi /etc/fstab (if you don't like vi, try nano
The format is as follows:
servername:dir /mntpoint protocol access, options
In the fstab file, you should end up with lines similar to below for each network mount:
//192.168.1.15/Video /mnt/Video  cifs  guest,uid=1000,iocharset=utf8  0  0
//192.168.1.15/Audio /mnt/Audio  cifs  guest,uid=1000,iocharset=utf8  0  0

In my case, I was migrating my database from OSX and had to copy it from Mac OSX to Linux.

To do this, ensure you disable the ‘Empty Trash Automatically After every scan’ check box in Plex Server / Library page on the TARGET Plex server, (this is because it will for a time have no library and it may decide to delete stuff you want to keep).

Quit/stop your Plex Media Server in both the original location and the target location (no Plex Media Server should be running while it’s database is being moved or created)

On Ubuntu

service plexmediaserver stop

service plexmediaserver status (to check it has been stopped – it should say stop/waiting if stopped)

Copy your DATABASE files to the location of the new plex media

The locations where you can copy from and to are listed below:

Windows: %LOCALAPPDATA%Plex Media Server
OSX: ~/Library/Application Support/Plex Media Server/
Linux: $PLEX_HOME/Library/Application Support/Plex Media Server/ (on ubuntu Library is located in /var/lib)
QNAP NAS: /share/MD0_DATA/.qpkg/PlexMediaServer/Library/Plex Media Server/
ReadyNAS NAS ROS4: /c/.plex/Library/
ReadyNAS NAS ROS6: /apps/plexmediaserver/MediaLibrary/Plex Media Server/
Synology NAS: /Volume1/Plex/Library/Application Support/Plex Media Server/

In my case I’m moving from OSX to Ubuntu (mainly because even with the OSX automount options explained here, OSX still can’t give a reliable persistent mounting system due to bugs).

On the Mac: rsync -avh –progress ~/Library/Application Support/Plex Media Server username@192.168.43.20:/home/username/

rsync -av  ~/Library/Preferences/com.plexapp.plexmediaserver.plist username@192.168.43.20:/home/username/

On Linux rsync -avh –progress /home/username/Plex Media Server/ /var/lib/plexmediaserver/Library/Application Support/Plex Media Server/ –whole-file –delete-after

rsync com.plexapp.plexmediaserver.plist /var/lib/plexmediaserver/Library/Preferences/

Don’t forget to delete the contents of the plugin directory as these are specific to the operating system Plex is installed on. (You might also want to delete the contents of the update directory given it’s likely to contain updates for a non-linux OS)

cd /var/lib/plexmediaserver/Library/Application Support/Plex Media Server/Plug-ins

rm *-Rf

Update owner of newly copied files (plex on ubuntu uses a user and a group called plex to operate).

chown plex.plex /var/lib/plexmediaserver -Rfv

Also, ensure your permissions on the NAS are set correctly.  This is out of scope of this since it get’s quite complicated, however the command chmod is what you’re after and it’s best if you avoid your NAS GUI.

If you mess up your permissions, they should be:

drwxr-xr-x  3 plex    plex  for all of the directory except the Preferences.xml file, which should be: -rw——-  1 plex plex

service plexmediaserver start

Also note the correct procedure to set up your plex media permissions here.

Configure Plex to see the new library in the new Linux mount points you just created

Edit your Library settings

Login to your plex installation through your web browser

In your web browser, go to: http://192.168.1.1:32400/web/index.html

Hover over the Movies (or whatever part you’re trying to migrate) with your mouse.  A pencil icon will show up,click on this.

Choose the Add folders option on the left hand side

KEEP ALL EXISTING LOCATION(S) IN PLACE and add your new location(s) by clicking, ‘Browse for Media Folder’

Choose the appropriate locations you created previously such as /mnt/Video

Click save changes, and if a library rescan doesn’t start, make sure you start one manually.

Once complete, turn on the ‘ ‘Empty Trash Automatically After every scan’ check box in Plex Server / Library page’ again and then you can safely remove the previous library mount locations through the steps above, this will get rid of any dead links to the former video location.

Repeat this for as many library sections as you have.

[/vc_tta_section][vc_tta_section title=”Final Word” tab_id=”1483657035357-36e2d8d1-b325e50c-cffe9549-9db4″][vc_custom_heading text=”Final Word”]

Plex is a powerful media center, but it’s also a powerful media server.  In this configuration, it’s a true server that holds it’s own like no other product can.

If you have an Apple TV, take a look at our Plex with ATV guide here.

Marshalleq

[/vc_tta_section][/vc_tta_tabs]

How to: Edit Crontab on QNAP and keep the changes after a reboot

Problem / Outcome Summary

  • This article will show you how to make changes to crontab on a QNAP NAS and have them kept after a reboot
  • Please see the ‘Summary Overview’ tab below for a high level view of the objectives this ‘howto’ will achieve.

Why might I want to do this?

  • If you want to add a scheduled task to your QNAP NAS, you would undoubtedly want to know that it saves permanently
  • The normal method for saving your crontab does not work on a QNAP NAS after it is rebooted

To be clear, what does Crontab do?

Simply put, crontab is a process that runs on *nix based systems (that’s Unix, Linux, BSD etc) and schedules programs to run on preset schedules.  Common types of things ‘triggered’ by the crontab process are backups, email server tasks, log rotations and database maintenance.

How does Crontab work?

Crontab works by processing a list in a textfile (the crontab file), in order and processing it as per your configuration.  In that configuration, you point it at other programs or files and say to them to run at your configured schedule.

An example of a line in crontab is shown below:

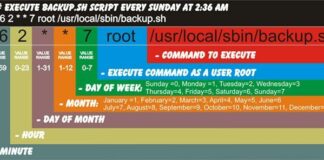
30     20     *     *     *         rm /home/someuser/tmp/*

There are plenty of detailed examples on how crontab works on the internet such as this at adminschoice.com which will explain the format of the above crontab line.

So how do I make the changes stick after a reboot?

This is really, really simple.

  1. Edit your crontab file eg: vi /etc/config/crontab
  2. Make crontab see the changes: crontab /etc/config/crontab
  3. Restart the crontab service: /etc/init.d/crond.sh restart

All done!

Marshalleq

How to: Create a proper backup process and why you need one

Problem / Outcome Summary

  • This article will show you what a traditional backup process is and why you need one
  • Please see the ‘Summary Overview’ tab below for a high level view of the objectives this ‘howto’ will achieve.

Why might I want to read this?

  • Because you value your data (photographs, documents, music etc).
  • Because this is what the large corporates do (who’s businesses would fail if their data was lost) and obviously they have a lot of experience in knowing how to protect data

To be clear, what is the difference between a regular backup and a proper backup?

This article comes from many conversations I have had with others, some of which enter the backup realm.  Some people are content with a single copy of their data, existing in their house somewhere, some people like to take that copy to another location, some people like to automate it, or put a structure around it and some people, still after many conversation’s have no idea why they need to back up at all.  Generally, I’ve found that there’s either a certain amount of circumstance and practicality around this decision or a certain amount of misunderstanding, which I want to call ignorance, except that would imply something which doesn’t apply to people whom are clearly intelligent.  However, it truly is surprising how much some may not want to listen to reason, which from my experience always changes once they’ve lost the last 10 years of their family photography to a hard drive crash, fire or burglary.

To that end, a true and proper backup would protect you from all of these types of failures, not just a single type.  There most definitely is a place for lesser backups (I have some of my content that is never backed up even once), but we all do need to understand the appropriate solution for the appropriate need so an informed decision can be made.

So what are the different types of backups?

Well, some of these are not officially ‘types’ in the IT world, however they serve their purpose in certain circumstances.  Please let us know if you know of a different type of backup, not listed here so we can add it.

  • Single Copy Local: A complete copy of the relevant data, stored locally, most likely on another separate device and fully able to be overwritten by another single copy
  • Single Copy Offsite: A complete copy of the relevant data, stored offsite, most likely on a separate device and fully able to be overwritten by another single copy
  • Single Copy Internet / Cloud: A complete copy of the relevant data, stored on the internet and fully able to be overwritten by another single copy.
  • Multiple Copies Local:  Multiple copies that are stored locally, most likely on an external device and able to be overwritten by another single copy
  • Multiple Copies Offsite: Multiple copies that are stored externally, most likely on tape, and not able to be overwritten by another single copy unless it is scheduled to do so
  • Multiple Copies Internet / Cloud: Multiple copies that are stored on servers accessed via the internet or ‘cloud’ generally cannot be overwritten, unless scheduled to do so

[alert color=”EBA132″ icon=”fa-align-right” title=”Please note:”]These are the types of backup ‘storage’, and should not be confused with the method of backup file selection and transfer.  Backup file selection and transfer methods can include, Incremental, Full, Partial and even delta which are not discussed here.[/alert]

Right, so what is the practical difference between the different types of backups and why do they matter?

This can be summed up by thinking about the disaster scenarios.   Common scenarios include, accidental deletion and drive failure, not so common scenario’s include file or drive corruption, fire, flood and theft.

When you consider each of these scenario’s, you can see that different backup methods are required to fully mitigate against the particular failure.  To make this easier to understand, we’ve created the table below:

Accidental DeletionDrive FailureFile/Drive CorruptionFireFloodTheft
Single Copy LocalPartialYesNoNoNoNo
Single Copy OffsitePartialYesNoYesYesYes
Single Copy InternetPartialYesNoYesYesYes
Multiple Copies LocalYesYesYesNoNoNo
Multiple Copies OffsiteYesYesYesYesYesYes
Multiple Copies InternetYesYesYesYesYesYes

In the table above, you can see clearly that a local copy obviously does not protect you from catastrophic failure and that an offsite copy does.  This is obvious as clearly fires, thefts or floods can complete destroy all the copies of data within a single location.

What is interesting though, is a single copy does not protect you from file corruption and only partially protects you from file deletion.  This is because when a file is deleted, and depending on how your backups are copied, you may actually be telling the system to remove any files that do not exist in the source.  With only a single copy available, you have now lost the point in time where that file existed.  In addition, when a file becomes corrupted, the file looks normal to the copy process (even though it can no longer be opened) and as such the backups actually copy the corrupted file to the backup target as is.  This then means that your backups now have no copy of the original uncorrupted file.

To mitigate this, multiple copies that are retained for periods of time must be kept.  Companies have been using various systems to create multiple offsite copies for years, for the very purpose of ensuring the data is able to be restored from any point in time, should a disaster occur.  Arguably, the most famous of these processes is called, ‘Grandfather, Father, Son’ or GFS for short.

But before we explain we also need to consider, what type of files constitute a more serious backup vs what kind of files could for example, just have a single copy.

Documents

For most people, documents stored on computer would be the most obvious first choice when choosing a more serious solution.  Documents tend to get added to, edited and moved around, often many not being re-opened for years and they’re small in size.  Documents are often important, but also, unless you’re filling them with images, documents are usually quite small, making them cheap and easy to back up.

Pictures

Pictures are also often important, given that most people keep years of photo’s on their computer hard drives and never make an additional copy or print them out.  Photo’s however, can end up using quite a lot of space which creates some challenges when creating multiple backups.

Music

Music is also quite large, usually somewhat similar in size to pictures, however, music usually comes from sources that can be recreated.  For example, if you’re an iTunes user, you can re-download the music again automatically on any device using your iTunes account.  If you made the music from CD’s, you may be able to recreate from CD again and if you’re someone that got your music from somewhere else, you can probably get it from there again.  For these reasons, I’d recommend thinking twice before delving into a complicated backup regime.  Perhaps just create a single offsite backup.

Video

Video is an interesting one and comes in many forms.  Some people have large video libraries converted from physical media, some people have home video converted from VHS, 8mm, MiniDV, MP4 formats etc.  Video can get very large and storing it with complicated backup regimes can consume a lot of time, effort and storage media.  I’d still advocate for at least one, offsite copy of some sort.

Other

There are still other types of data to backup.  Databases and email for example have their own challenges, but those are more complex examples that we won’t be covering here.

GFS Backup

So a ‘Grandfather, Father, Son’ backup is arguably the most popular tried and true backup process that wraps around your actual backups.  It stipulates when to make a backup, of what type and how long to store it for.  The idea, is simply to be able to go back to a point in time of your choosing, be it days, weeks, months or even years.  How long is up to you and is only limited by the amount of storage you have available.

So let’s have a look at a typical GFS schedule below so you can see what I mean.

DailyWeeklyMonthlyYearly
Number of Tapes8467

The table above represents the typical number of storage devices (still most commonly tape) required for a standard GFS backup.  18 tapes would be required, plus one tape for every year you wish to store your data.

How GFS works is quite simple:

  • Label the tapes Daily 1-8, Weekly 1-4, Monthly 1-6, Yearly 1-7 (or just write the year on these if you intend to keep them indefinately).
  • Then, Monday to Thursday, rotate each of the 8 ‘daily’ tapes into your backup scheme
  • Each Friday, insert each one of the Weekly tapes instead of the daily
  • On the last Friday of each month, utilise the monthly tape in order (6 monthly tapes are chosen, but 12 could be used if it was appropriate)
  • And finally on the last business day of each year, backup to the yearly tape.

By following this method, you can go ‘back in time’ with your backups, using minimal devices (tapes, USB sticks, DVD’s etc) up to two weeks on a daily basis, 4 weeks on a weekly basis, 6 months on a monthly basis and of course yearly.

To make this all work, (assuming you’re doing it manually) you’ll need to publish your backup schedule and ensure the right tapes or devices are attached to your backup software each day.

This can best be explained by example.  Please see the below schedule created for Jan/Feb 2015 where the Months are going down the page, and the date of the month is going across the page.  Weekends are noted as backups are not run on those days.  You can of course elect to modify to your choosing.

(Scroll across the table by clicking your mouse in the table and using your right arrow key to move across)

201512345678910111213141516171819202122232425262728293031
JanuaryDaily 4Weekly 1SaturdaySundayDaily 5Daily 6Daily 7Daily 8Weekly 2SaturdaySundayDaily 1Daily 2Daily 3Daily 4Weekly 3SaturdaySundayDaily 5Daily 6Daily 7Daily 8Weekly 4SaturdaySundayDaily 1Daily 2Daily 3Daily 4Monthly 1Saturday
FebruarySundayDaily 5Daily 6Daily 7Daily 8Weekly 1SaturdaySundayDaily 1Daily 2Daily 3Daily 4Weekly 2SaturdaySundayDaily 5Daily 6Daily 7Daily 8Weekly 3SaturdaySundayDaily 1Daily 2Daily 3Daily 4Monthly 2Saturday

Backup Software

The problem with all these scenarios, is it becomes difficult to keep offsite backups current.  If you’re a big corporate standing to lose a lot of money then this isn’t a problem as you’re likely to pay a specialist company to come in each day and collect your backup media.  If you’re not a large company however, this is more of a challenge.  Not only do you have to decide how often is practical to take a new copy off site, but you have to actually run the backup and consider how much media to buy.  Luckily, these day’s we have more options available that ever before.

Local Backup

One of the best backup systems around, that runs a system very similar to GFS, is Apple’s “Time Machine”.  This of course, is only available if you own a mac.  It is also possible to combine Time Machine with an offsite backup scenario.

If you run Windows, there is no backup solution available that automates any sort of GFS system.  The closest thing is shadow copy, but it’s really not that close.  A better solution would be to get third party software such as the free Genie Timeline.

If you’re lucky enough to run a NAS device, be sure to check out the snapshot feature.  If your NAS does not have a snapshot feature (QNAP doesn’t), then be sure to check out rsnapshot, of which a guide will be coming to Tech-KnowHow.com soon.

Internet Backup

These days, there is of course the internet.  This makes the challenges of organising of moving files offsite redundant, introduces advantages such as being able to backup at more frequent schedules than daily and obviously can include weekends.  Generally there is a fee for this type of backup and you would need to weigh up the cost vs the convenience, features and risk.  We’ll be doing a review on some of these internet or ‘cloud’ based backup services in the near future, so be sure to check back.

So there you have it, a host of information you never knew you needed about backups.

As always, I welcome your insights and opinions in the comments section below.

Marshalleq

Howto: Install Mac OS X in VMWare

0

[vc_tta_tabs active_section=”1″ pagination_style=”outline-square”][vc_tta_section title=”Summary” tab_id=”1483657727692-588765df-8139e50c-cffeb7f8-2a15″][vc_custom_heading text=”Problem / Outcome Summary”]
  • This article will show you how to install Mac OS X, inside a VMWare Host, as a virtual operating system.
  • Please see the ‘Summary Overview’ tab below for a high level view of the objectives this ‘howto’ will achieve.

Why might I want to do this?

  • To make a Mac OS X environment that is completely separate from your main Mac OS.
  • To create a separate test environment for a project, server or just to learn on.
  • To run a different operating system that that which is installed
  • To run multiple operating systems, simultaneously on a single computer
[/vc_tta_section][vc_tta_section title=”Foreword” tab_id=”1483656936153-fec58c10-e606e50c-cffeb7f8-2a15″][vc_custom_heading text=”Foreword”]

To be clear, what is VMWare and what is virtualisation?

Simply put, virtualisation is the name given to a virtual representation of something physical.  In this instance we’re creating a virtual computer within a physical computer.  VMWare is ‘the’ foremost and most mature virtualisation product available, that has provided innovation in this category for well over a decade.  Virtualisation is utilised by organisations big and small around the globe, initially for purposes of saving on expensive server hardware (you can run multiple ‘computers’ (virtual guests)) inside a single computer, but it has now expanded to also provide greater flexibility in the areas of data recovery, testing and many more avenues.

Products available

While VMWare is currently the most stable and mature of these platforms, other platforms exist with capabilities on par or similar to VMWare.  These include Microsoft Hyper-V, Open Source Xen, Citrix XenServer, Oracle’s VirtualBox and Apple’s Parallels.

The products come in many versions for Desktop or Server based use and differing features to match.  The dominant Mac versions are desktop oriented (though you can run servers on them well with tweaks) and include the big three, VMWare Fusion, Apple Parallels and finally the very capable (and free) Oracle Virtualbox.  For the extra money Fusion and Parallels offer a tighter integration with your operating system, making it possible to run windows applications almost as though they were a native mac application.

Within a virtual machine, you are not restricted to running a single operating system, as such you can run on your Mac a copy of Mac OS X server, Microsoft Windows 8.1, and a copy of Sabayon Linux, simultaneously.  You can share files between each operating system and copy and paste commands to and fro with the greatest of ease.

Please note: If you’re considering getting into virtualisation, the main requirement you have is memory (RAM).  Each machine will need to be allocated an amount of memory and you need to have enough so that each machine can operate.

[/vc_tta_section][vc_tta_section title=”Pre-Requisites” tab_id=”1483656936239-1facad3b-9216e50c-cffeb7f8-2a15″][vc_custom_heading text=”Pre-Requisites”]

Software Dependencies

  • VMWare Fusion or equivalent
  • Mac OS X with a recovery partition

Hardware Dependencies

  • Any recent Intel based Mac computer

Tools Required

  • None

Other Dependencies

  • A working internet connection
[/vc_tta_section][vc_tta_section title=”Summary Steps” tab_id=”1483657008528-9fc62da7-5742e50c-cffeb7f8-2a15″][vc_custom_heading text=”High Level Summary Steps”]

The below lists the high level summary of steps we’re about to take during this howto.

  • Create and configure a VMWare Virtual Machine
  • Install Mac OS X
[/vc_tta_section][vc_tta_section title=”Implementation” tab_id=”1483657023013-0e8f9bfb-cd0fe50c-cffeb7f8-2a15″][vc_custom_heading text=”Implementation”]

Create and configure a VMWare Virtual Machine

  1. Open VMware, click Add, new from the top left of the VMWare screen.
  2. Click More Options.
  3. Click Install OS X from the recovery partition
  4. Click Continue
  5. You will now be prompted for a file name and location to store your VMWare file. Ensure this is somewhere appropriate where you can find it again. Recommendation is to change the default name from OS X 10.10 to something more appropriate.  Consider leaving the version number of your OS out of the file name as it’s likely to change with the first update.
  6. Click OK
  7. On the next screen you will be presented with the default VM settings and the opportunity to customise them. The main change I’d recommend is to change networking to ‘Bridge’ networking.
  8. To do this, click customise, click network adapter and click Ethernet or WiFI as appropriate under the bridged networking section. This will make the VMWare Guest perform the same as a separate computer on your network, rather than speak ‘through’ your current computers IP address.
  9. Click the ‘Show All’ button to go back
  10. Go back and change any other settings as appropriate.
  11. When finished, simply close the customisation box and when ready click the Play triangle in the main screen of the virtual machine you just created. This will start the OSX setup process inside your virtual machine window

Install Mac OS X

  1. Choose, ‘Use English for the main language’ and click the next arrow at the bottom
  2. On the next screen choose, ‘Reinstall OSX’ to install a fresh copy of OSX from scratch and click ‘Continue’
  3. Click the ‘Contine button on the next setup screen of the OSX install process
  4. You will receive a message saying that OSX will check your computers eligibility with Apple. Click Continue.
  5. Click Agree to agree to the terms of the licence agreement and Agree a second time to agree to ‘reading’ the licence agreement.
  6. Choose the ‘Macintosh HD’ volume that equals the size of volume you created in the earlier step. Do not choose the ‘Recovery HD’ volume. Click Install
  7. Enter your Apple ID to download the Recovery from the App Store
  8. OSX will now proceed to download your current version of OSX to the new virtual machine. This could take hours or minutes depending on the speed of your internet connection.
  9. Once downloaded, it will automatically start installing the software
  10. Upon completion, OSX will automatically restart with the normal OSX setup Wizard such as you would have when first turning on a new Mac. You’re done!
[/vc_tta_section][vc_tta_section title=”Final Word” tab_id=”1483657035357-36e2d8d1-b325e50c-cffeb7f8-2a15″][vc_custom_heading text=”Final Word”]

Using these steps you have a great platform on which to base a Mac OS X server implementation that you can use to host your own mail, server your own files to others or even host a web site.  Because it’s in OS X server it can be moved to any other computer quite easily by simply copying the Virtual machine file, should you get a new Mac or want to pop it up in the cloud.  Just be aware that Apple licencing currently states you must be running your virtual machine on Mac Hardware.

For some hints on setting up a Mac OS X email Server, please see our legacy article here.  A new and improved version to come in the near future.

As always, I welcome your insights and opinions in the comments section below.

Marshalleq

[/vc_tta_section][/vc_tta_tabs]