Problem / Outcome Summary
- This how to guide will show you how to set up and install Roon Audio Bridge to make a HiFi endpoint on PiCorePlayersqueezebox receiver using Raspberry Pi hardware and HiFiBerry Dac + Pro HAT
- Please see the ‘Summary Overview’ tab below for a high level view of the objectives this ‘how to’ will achieve.
This guide applies to:
- piCorePlayer on Raspberry Pi
- Roon Bridge
- HiFiBerry (Various)
Why might I want to do this?
- Because the the official HiFiBerry version of RoonBridge is unnecessarily large
- Because this enables the high quality lossless RoonBridge Audio Transport (RAAT)
- Because this allows you to combine Apple Airplay into your RoonBridge solution
- Because can include a high quality, low cost Squeezebox receiver
- Because you want to combine multiple audio transport types (above) in a single hardware solution
- Because this solution comes in at about 60MB, instead of the official HiFiBerry’s 1000MB solution
- Because the system runs entirely in RAM and does not break due to sudden power loss
- Because HiFiBerry do not give you access to their system via SSH, or any other means which goes against the spirit of Raspberry Pi
- Because you want to create an AirPlay target for your iPhone, iPad or Mac
- Because you want high quality audiophile grade sound
- Because you have a spare Raspberry Pi
- That’s a lot of reasons!
What do I get by combining a Raspberry Pi and piCorePlayer?
When I first looked at the HiFiBerry Roon image I was dumbfounded by the size of it. I mean, for what it is, it’s absolutely gargantuan. The second thing that dumbfounded me was for some unknown reason, HiFiBerry absolutely refuse to open up access to SSH.
Let’s just think about that for a minute. HiFiBerry are selling a DIY audio board, for a DIY computer that has a core target market of DIY people doing DIY with software and won’t provide username / password to do DIY on the underlying OS. I’m not sure what could possibly be going throught their minds, but clearly there’s something seriously wrong here. Further, HiFiBerry apparently do not know how to make a lightweight image and when attempting to discus with them on their forums, they (quite bluntly) will not consider opening it up, and gave a signal of ‘I don’t know what I’m talking about’ when suggesting I could make a smaller image. The contempt they have shown their customers is quite dissappointing and they clearly have either not considered who their market is, or one employee is letting the company down.
Anyway, this is Linux, so we can do what we like right?
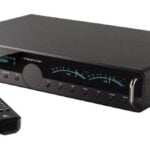
The first and best thing I like about building our own setup are the choices. For example, you can choose to use the standard 3.5mm audio out on the Raspberry Pi and plug it into a set of cheap computer speakers for an easy Squeezebox integrated solution for a spare room, kids or otherwise. Alternatively you can go and have a look at the myriad of hifi add-on boards for the Raspberry Pi such as the HiFiBerry or the MamboBerry and connect this up to a higher end hifi system. I have mine connected to an amazing sounding original Fatman iTube amp for something a bit different, which makes a nice small audio target for an apartment with a surprising amount of grunt and spaciousness about it. Best of all, it’s very small.
On top of that, piCorePlayer features AirPlay support so you can wirelessly connect to it from your iphone instead, completley bypassing the Squeezebox player. Also, the piCorePlayer software can run the server portion of Squeezebox making a nice all in one solution.
Pre-requisites
Skill Level – Beginner
This ‘howto’ article is classified as Beginner. There may be terminology used that is technical and concepts requiring some experience. With a bit of willingness, the guide shouldn’t be too hard to follow, provided you read it through first and understand the concepts. Some resources that may be helpful are our glossary of terms page and Wikipedia. In addition, we would encourage you to leave insights and opinions in the comments section below and questions in our forums. We do however take no responsibility for anything that goes wrong with your implementation as a result of this article.
Software Dependencies
Tools Required
Hardware Dependencies
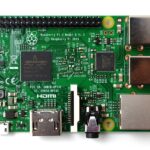
Raspberry Pi
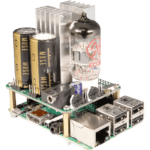
Optional add on HiFi board such as the HiFiBerry DAC+ or the MamboBerry HiFi DAC+
Other Dependencies
A working Internet Connection is preferred
Summary Overview
High Level Summary Steps
The below lists the high level summary of steps we’re about to take to set up a working Squeezebox Receiver using Raspberry pi and piCorePlayer.
- Download and flash the piCorePlayer onto your SDCard
- Boot the Raspberry Pi
- Connect to the piCorePlayer software and configure
- Test
Implementation
Download and flash the piCorePlayer onto your Raspberry Pi’s SD card
Download the latest piCorePlayer image from their web site here.
Flash the image to your SD card. See our how to for this here if you’re unsure how.
When complete, insert the card into your Raspberry Pi, ensure you have plugged in a network cable and the HDMI cable so you can get the IP Address. Alternatively, you may be able to find this in your router’s DHCP table.
Boot the Raspberry Pi
Power on your Raspberry Pi. It will begin to show some linux boot screen items and may reboot once or twice. When finished you will see a line that reads IP Address on the screen that looks something like 192.168.1.21. Note this down for the next step.
Connect to the piCorePlayer software and configure
Enter the IP Address you noted above into the web browser of another computer on the same network. You should be presented with the piCorePlayer configuration screen.
In the configuration screen that comes up there are six tabs across the top.
Click the tab that says, ‘Squeezelite Settings’
In that tab, ensure you click the sound output type you want and click save. This is where you tell the system you have a MamboBerry or a HifiBerry.
Believe it or not, that’s all you need to do to set this up, with the rest being already set in the server. If you’ve not set up a server yet, be sure to check out how to do this on Ubuntu linux with our comprehensive guide here. The server is also available for Mac and Windows.
You can of course also set this up via WiFi, which is on the WiFi tab. Yes it’s as simple as it looks.
The LMS tab will allow you to set up the Logitech Media Server to run on the Raspberry Pi instead of on a separate computer.
Confirming it’s working
Connect to your squeezbox server by going to it’s IP Address on port 9000, or use your remote if you have one. e.g. http://192.168.43.30:9000
You should now be able to play your music through your own custom made Raspberry Pi Squeezebox Receiver!
Final Word
Assuming this all worked for you, you now have an amazing sounding, integrated, cheap digital music player that rivals many DAC units costing around $1000. There is the new ChromeCast Audio which is interesting, however that does not output high quality HD music, rather is more oriented around low quality phone music rather than high quality audio, plus this is a true client / server setup.
That said, there is a Chromecast Audio plugin for Squeezebox already made if you did want to go down this route. As you can see, squeezebox has quite an extensive set of features (there are probably around 100 plugins like this).
Anyway, I hope you found this guide useful and please do not hesitate to hit me up in the comments below if you have any issues or questions.
Marshalleq


